

How Do I Make My Text Animate Adobe Photoshop Cc
In this tutorial, nosotros will create a VHS-style 3D Photoshop outcome for text layers using smart filters, slope fills, and video overlays.
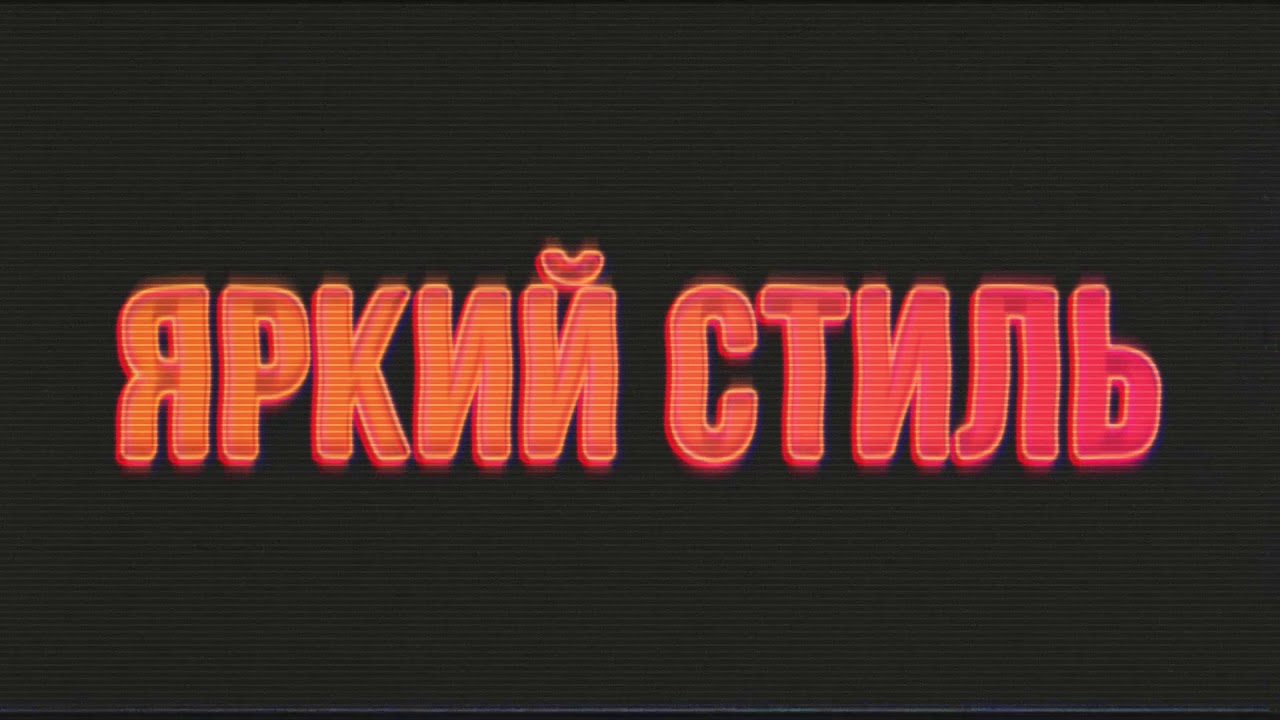
You can find enough of Photoshop text actions on GraphicRiver, and if you want to create this 3D text consequence in just a few simple clicks, then check my Animated VHS Text Issue Action created the same way.

When you're washed with this tutorial, check out 10 ways to optimize the final product for web use from this guide:
Tutorial Assets
- Bebas Neue Font or whatever other like font you lot want to use for this effect
- VHS Video Overlay
i. How to Set up the Document
Step 1
PressControl-Northward to create a new document and use the following settings:
- 1920 x 1080 px
- 300 dpi

Step ii
Create a new layer usingShift-Control-Nand name it "placeholder".

Step 3
Right-Clickon the layer and select Convert to Smart Object.

Step iv
After that,Right-Click > Edit Contents on the "placeholder" layer.

Pace five
ClickT to open theHorizontal Type Tool and create any text using the Bebas Neue font with a size of84 pt. After that, close and save the placeholder.

Step 6
Right-Click on the smart object, selectDuplicate,and create two duplicates of the layer.

Step 7
Rename the layer to "text" and "glow" and make the offset smart object Invisible.

Step eight
Select the background layer andMake full information technology with#141414 colour usingShift-F5.

ii. How to Create VHS Text Effects
Footstep i
Now permit's showtime to create our text effects. Select the "Text" layer and then go toFilter > Mistiness > Gaussian Blurand prepare theRadius to 2 px.

Step 2
After that, go toFilter > Blur > Motion Blurand apply the post-obit settings:
- Angle: xc°
- Altitude: 60 px

Step three
Go toFilter > Distortion > Waveand employ the post-obit settings:
- Number of Generators: 1
- Wavelength: 1 and 298
- Amplitude: 1 and vi
- Type: Sine

Step 4
Now we demand to create layer style effects. Double Click on the Layer and so get to Slope Overlay.

Step 5
Use the post-obit settings for your slope:
- Blend Mode: Normal
- Opacity: 100%
- Angle: -180°
Set the following colors for your gradient: #fc3d4f ; #fd7335 ; #f57c21.

Pace 6
After that, you need to add together Gaussian Blur and Wave Result with the same parameters to the "glow" layer.

Step 7
Double-Click on the layer and add anOuter Glow effect with the same gradient as we utilize before and the post-obit settings:
- Blend Mode: Screen
- Opacity: 100%
- Spread: 4%
- Size: 12 px

Pace 8
Change the Make full setting of the layer to 0%.

Step 9
Select your smart objects while holdingShift, and and then hit theCreate a New Groupingicon and proper noun it "Main Text".

Footstep x
Create two duplicates of the group and proper noun them "Color Shift 01" and "Color Shift 02".

Step xi
Double-Click on the "Color Shift 01" layer and Uncheck the Green andBlueish color channels.

Footstep 12
Double-Clickon the "Colour Shift 02" layer andUncheck theCarmineandGreen color channels.

Stride xiii
Movement the "Color Shift 01" grouping of layers four px to the left while holdingShift.

Step 14
Motion the "Color Shift 02" group of layers 8 px to the right while holdingShift.

iii. How to Create Overlaying Elements
Step 1
Now nosotros demand to create "TV Lines" overlay textures. Create a new layer usingShift-Control-N and Fill up it with #282828 colour.

Step two
Get toFilter > Filter Gallery > Sketch and selectHalftone Pattern. Employ the following settings:
- Size: 2
- Contrast: 50

Step iii
Create a indistinguishable of the layer and and then move information technology 1080 px upwards while holdingShift .

Footstep 4
After that, you need to select both of the layers and move them 1080 px up once more.

Step v
Create another duplicate of the "layer 1" and then move it 1080 px down.

Step 6
Select all three layers and Right Click > Merge Layers. Proper noun information technology "Idiot box Lines".

Pace 7
Change the Blending Way of the layer to Overlay and the Opacity to 25%.

Step 8
Go to File > Place and and so select the MP4 file from the attachment of this tutorial. Resize and rotate information technology to the borders of the certificate.

Step ix
Alter the Blending Fashion of the layer to Screen.

Step 10
Select your overlay layers while holdingShift, and so hit theCreate a New Groupicon and name it "Video Overlays".

Step eleven
Now we need to create gradient overlays for our video. Get toLayer > New Fill up Layer > Gradient and create ii gradients. Proper noun them "Calorie-free Leaks 01" and "Calorie-free Leaks 02".

Step 12
Double-Click on the starting time gradient fill in the Layers panel and use the following settings:
- Manner: Linear
- Angle: -35°
- Calibration: 232%

Step 13
Afterward that, Left-Click on theGradientin the aforementioned consoleand create a new slope with the post-obit settings:
- Color:
#ff7511,Location: 0%; Opacity: 100% - Location: 35%; Opacity: 82%
- Location: 51%; Opacity: 0%
- Color:
#e90f43,Location: 61%; - Location: 67%; Opacity: 82%
- Color:
#f3005e,Location: 100%; Opacity: 100%

Step fourteen
Double-Click on the second slope fill in the layer panel and use the following settings:
- Manner: Linear
- Angle: -171°
- Scale: 232%

Footstep fifteen
After that, Left-Click on theSlopein the aforementioned paneland create a new gradient with the following settings:
- Colour:
#315934,Location: 0%; Opacity: 100% - Color:
#ac9102,Location: 100%; Opacity: 100%

Footstep 16
Change the Blending Modes of both gradients to Color Contrivance.

Step 17
Select your overlay layers while holdingShift, and so hit theCreate a New Groupicon and name it "Lite Leaks".

4. How to Create the Animation of the Layers
Step ane
At present nosotros are ready to start creating our blitheness. Go toWindow > Timeline and click on theCreate Video Timeline icon.

Step 2
Reduce the duration of the timeline to 05:00 past moving the icon shown below.

Step 3
Now you need to create the first keyframe. Select the "Text" layer and click on theTimer icon aboutTransform to create the firstKeyframe.

Step 4
Motion theTime Indicator to0:00:00:10and and so move the layer 15 px upward while holdingShift.

Footstep 5
Move theTime Indicator to0:00:00:xxand so move the layer 15 pxdownwards while holdingShift.

Pace 6
Select the keyframes we only created while belongings Shift and thenRight-Click > Copy.

Step 7
Motion theTime Indicator to0:00:01:00and then hit the Keyframe icon.

Step 8
After that,Right-Click > Paste on the final keyframe to duplicate the keyframes nosotros created earlier.

Step 9
Create duplicates of the keyframes until you fill the whole timeline.

Footstep 10
Select all the keyframes of the "text" layer and paste them for the "glow" layer.

Step xi
Select the "Telly Lines" layer and click on theTimer icon nearPosition to create the firstKeyframe.

Step 12
Move theTime Indicator to0:00:05:00and move the layer2160 px down while propertyShift.

Step xiii
Select the "Light Leaks 01" layer in the timeline panel and reduce the size of the clip toKickoff: 02:00 andElapsing: 02:00.

Step xiv
Select the "Calorie-free Leaks 02" layer in the timeline console and reduce the size of the prune to Start: 03:00 and Duration: 02:00.

Step 15
Click on the Transitions icon and select Fade.

Step sixteen
Drag and drop the Fade transition to the start and the end of the "light leak 01".

Footstep 17
Right-Click and change the duration of both Fade transitions to 0.97 due south.

Pace 18
After that, you need to apply the same transition with the aforementioned duration to the second "light leaks" layer.

Footstep 19
Create a new layer usingShift-Control-N, and then fill it with black color and proper name information technology "Fade In/Out".

Step 20
Change the Fill of the layer to 0%.

Step 21
And finally,Draganddrop theFade With Blackness transition to the start and the end of the "Fade In/Out" layer.

five. How to Render the Animation every bit a Video
Pace 1
Our animation is at present ready for rendering. Click on the icon in the upper correct corner and selectRender Video.

Step 2
Gear up the post-obit settings in theRender Videoconsole:
- Format: H.264
- Size: Document Size
- Range: All Frames

Crawly Piece of work, You're At present Washed!
Your video is prepare! In this way, we tin can create an animated VHS text effect in Adobe Photoshop using the smart objects, gradient fills, filters and video overlays.
I hope you enjoyed this tutorial, and if you want to create this effect using Photoshop actions, y'all can check my Animated VHS Text Consequence Action on GraphicRiver, which will assistance you to create this text outcome in a few simple clicks.
Source: https://design.tutsplus.com/tutorials/how-to-create-animated-text-effect-photoshop-action--cms-33484
Posted by: wrighthatelve.blogspot.com
0 Response to "How Do I Make My Text Animate Adobe Photoshop Cc"
Post a Comment